1
/
su
1
GOOD MOOD
PANNOLINI LAVABILI Istruzione d'uso, Instructions for use, Instrucciones de uso, تعليمات الاستخدام, Mode d'emploi
PANNOLINI LAVABILI Istruzione d'uso, Instructions for use, Instrucciones de uso, تعليمات الاستخدام, Mode d'emploi
Prezzo di listino
€0,00 EUR
Prezzo di listino
Prezzo scontato
€0,00 EUR
Imposte incluse.
Spese di spedizione calcolate al check-out.
Quantità
Impossibile caricare la disponibilità di ritiro
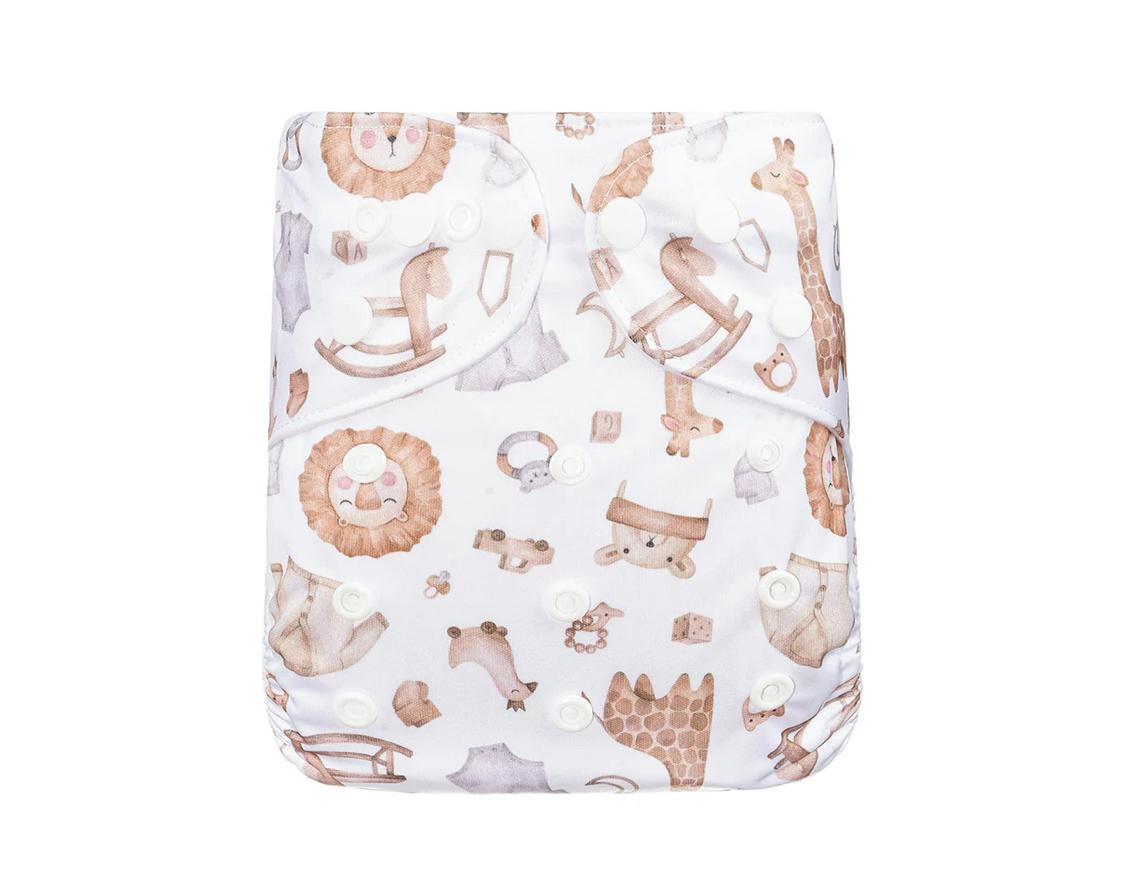
ITALIANO Come funziona il pannolino tascabile?
Passaggio 1 – Regolazione della taglia Posiziona il pannolino aperto sotto il tuo bambino. Puoi riconoscere la parte anteriore dagli snap (sul retro non ci sono). Regola la misura tramite i bottoni a pressione anteriori e laterali.
Passaggio 2 – Chiusura del pannolino
Una volta scelta la misura, chiudi il pannolino usando gli snap laterali. L’esterno è in PUL impermeabile e traspirante; l’interno è in micropile “stay-dry”, un tessuto morbido e drenante che lascia la pelle più asciutta.
Una volta scelta la misura, chiudi il pannolino usando gli snap laterali. L’esterno è in PUL impermeabile e traspirante; l’interno è in micropile “stay-dry”, un tessuto morbido e drenante che lascia la pelle più asciutta.
Passaggio 3 – Uso degli inserti Nel pannolino tascabile gli inserti vanno sempre all’interno della tasca, non a contatto diretto con la pelle. Inserto in bambù (A): assorbente e delicato, progettato per stare nella tasca. Inserto in microfibra (B): assorbe velocemente ma può seccare la pelle solo nella tasca. Se necessario, puoi utilizzare un velo raccoglitore biodegradabile (smaltire secondo le regole del proprio
Comune).
Comune).
Passaggio 4 – Controllo della vestibilità Assicurati che il pannolino aderisca bene a gambe e pancia senza lasciare spazi. Gli inserti non devono sporgere.
Passaggio 5 – Pronti, via! Non tirare il pannolino verso l’esterno come gli usa-e-getta. Spingilo leggermente verso l’inguine: migliora la tenuta e riduce il rischio di perdite. Caratteristiche principali Taglia unica regolabile (3–15 kg) Doppie barriere antifuga.
Due aperture per inserire gli inserti Lavabile e riutilizzabile
ENGLISH How does the pocket diaper work?
Step 1 – Adjusting the size Place the open diaper under your baby. You can recognize the front by the snaps;
there are none on the back. Adjust the size using the front and side snaps. Step 2 – Closing the diaper Once the size is set, close the diaper using the side snaps.
The outer layer is waterproof and breathable PUL; the inner layer is soft stay-dry microfleece, designed to wick moisture away from the skin. Step 3 – Using
the inserts In a pocket diaper, all inserts must be placed inside the pocket, not directly against the skin. Bamboo insert (A): absorbent and gentle, designed to
be used inside the pocket. Microfiber insert (B): fast-absorbing but may cause dryness inside the pocket only. A disposable or washable liner may be placed
on top of the stay-dry layer if desired. Step 4 – Fit check Make sure the diaper fits snugly around legs and waist. Inserts must not stick out. Step 5 – Ready, set,
go! Do not pull the diaper away from the groin as with disposables. Instead, gently press it into the crease to improve fit and prevent leaks. Main features Onesize-
fits-most (3–15 kg) Double leak-guard elastics Two pocket openings Washable and reusable
ESPAÑOL ¿Cómo funciona el pañal de bolsillo?
Paso 1 – Ajustar la talla Coloca el pañal abierto bajo tu bebé. El frente tiene broches; en la parte posterior no
hay. Ajusta la talla con los broches delanteros y laterales. Paso 2 – Cerrar el pañal Una vez ajustado, cierra el pañal con los broches laterales. La capa exterior es
PUL impermeable y transpirable; el interior es micropolar stay-dry, suave y de secado rápido. Paso 3 – Uso de los insertos En los pañales de bolsillo, los
insertos se colocan siempre dentro del bolsillo, nunca directamente sobre la piel. Inserto de bambú (A): absorbente y delicado, para uso dentro del bolsillo.
Inserto de microfibra (B): muy absorbente pero puede resecar solo dentro del bolsillo. Puedes usar un forro desechable o lavable si lo deseas. Paso 4 –
Verificar el ajuste Asegúrate de que el pañal quede bien ajustado en piernas y cintura. Los insertos no deben sobresalir. Paso 5 – ¡Listo! No tires del pañal
hacia afuera como los desechables; empújalo suavemente hacia la ingle para evitar fugas. Características principales Talla única (3–15 kg) Doble barrera
antifugas Dos aberturas para insertos Lavable y reutilizable
FRANÇAIS Comment fonctionne la couche à poche ?
Étape 1 – Réglage de la taille Placez la couche ouverte sous votre bébé. Le devant se reconnaît grâce aux
boutons-pression, absents à l’arrière. Ajustez la taille avec les pressions avant et latérales. Étape 2 – Fermeture de la couche Une fois la taille définie, fermez la
couche avec les pressions latérales. L’extérieur est en PUL imperméable et respirant ; l’intérieur est en micropolaire stay-dry, doux et très drainant. Étape 3 –
Utilisation des inserts Dans une couche à poche, les inserts doivent être placés uniquement dans la poche, jamais directement contre la peau. Insert en
bambou (A) : absorbant et doux, à utiliser dans la poche. Insert en microfibre (B) : très absorbant mais peut dessécher dans la poche uniquement. Vous
pouvez ajouter un voile de protection jetable ou lavable si nécessaire. Étape 4 – Vérification de l’ajustement La couche doit être bien ajustée aux jambes et au
ventre. Les inserts ne doivent pas dépasser. Étape 5 – À vos marques, prêts, partez ! Ne tirez pas la couche vers l’extérieur comme une jetable. Enfoncez-la
légèrement dans l’aine pour améliorer l’étanchéité. Caractéristiques principales Taille unique (3–15 kg) Doubles barrières anti-fuites Deux ouvertures pour les
inserts Lavable et réutilisable
ARABO كیف تعمل حفاضة الجیب القابلة للغسل؟ الخطوة 1 –
بط المقاس ضعي الحفاضة المفتوحة تحت طفلك. يمكنك التعرّف على الجزء الأمامي من خلال أزرار
الضغط، بینما توجد أزرار في الخلف. يمكنك ضبط المقاس باستخدام أزرار الضغط الموجودة في الأمام والجوانب. الخطوة 2 – إغلاق الحفاضة بعد ضبط المقاس
المناسب، أغلقي الحفاضة باستخدام أزرار الجانبین. الطبقة الخارجیة مصنوعة من ال PUL المقاوم للماء والذي يسمح بمرور الھواء، أما الطبقة الداخلیة فھي من
المایكروفلیس (stay-dry)، وھي ناعمة وتساعد على سحب الرطوبة بعیدًا عن بشرة الطفل. الخطوة 3 – استخدام الحشوات ( الإنسیرت) في حفاضات الجیب يجب وضع جمیع
الحشوات داخل الجیب فقط، ولیس مباشرة على الجلد. الحشوة A ( خیزران 80 ٪ / بولیستر 20 ٪): أكثر نعومة وامتصاصًا، لكنھا مخصّصة للاستخدام داخل الجیب. الحشوة B
مایكروفایبر 100 ٪ / بولیستر): سریعة الامتصاص ولكن يمكن أن تسبّب جفافًا وتھیّجًا للبشرة → تُستخدم داخل الجیب فقط. يمكن استخدام بطانة (فوطھ) قابلة للغسل أو)
للاستعمال الواحد فوق طبقة ال stay-dry لتسھیل التنظیف وحمایة بشرة الطفل. الخطوة 4 – التحقق من الملاءمة تأكدي من أن الحفاضة محكمة حول الساقین والبطن دون
وجود فراغات. يجب ألا تبرز الحشوات خارج الحواف. الخطوة 5 – جاھز! تسحبي الحفاضة إلى الخارج كما في الحفاضات ذات الاستخدام الواحد، بل ادفعیھا قلیلًا
15 كجم) حواجز مزدوجة مضادة للتسرب فتحتان دخال الحشوات – نحو منطقة الفخذ لتحسین الإحكام وتقلیل فرص التسرب. المیزات الرئیسیة مقاس واحد قابل للتعدیل ( 3
قابلة للغسل وإعادة الاستخدام
Ti trovi bene con i pannolini lavabili GooD MooD®? 💚
Acquista online la linea completa e ricevi il -10% sul tuo primo ordine con il codice PRIMOORDINE10.
Share
No reviews